Set Up Reporting-Only Billing Meter
This page describes how you can set up a Billing Meter for reporting usages only.
Overview
You can create a billing meter that only reports usage and doesn’t use an existing billing provider integration like Stripe to charge customers. This allows you to use a custom or internal billing solution, where Moesif only tracks, meters, and reports the usage. By combining this with Moesif’s Billing Report Metrics, you can dig deep into analyzing your product usage and the corresponding revenue.
Moesif decouples metering and rating from billing providers so you can always analyze usage and how it ties to revenue, irrespective of the billing provider you utilize.
Set up Reporting-Only Billing Meter
To set up a reporting-only Billing Meter, first, select Billing Meters menu item in the navigation menu and then select + Add Billing Meter. Alternatively, select + Create New in the navigation menu and then select Billing Meter fromthe API Monetization section.
Then follow these steps:
Step 1: Select Custom Billing Provider
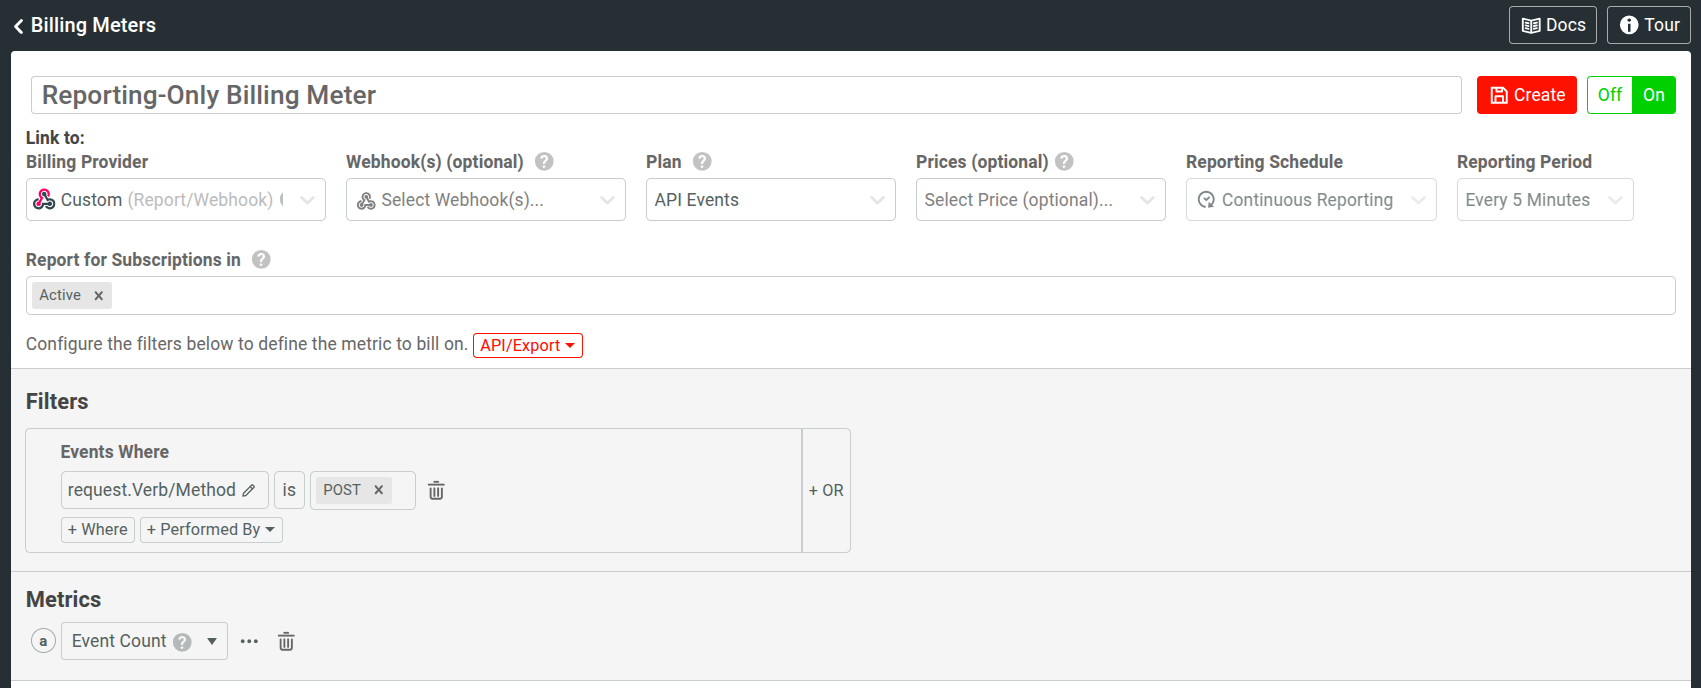
In the new Billing Meters screen, enter a name for your Billing Meter and select Custom as the billing provider. Do not select any webhooks.
Step 2: Specify Plan and Price Details
Optionally, select a Plan that Moesif attributes the usage to and the Price that Moesif meters according to. You can select from the available plans and prices, or select Add New Plan or Add New Price to create new ones.
Selecting Add New Plan presents a dialog where you you need to fill out the plan details. For more information, see Select or Create a Billing Plan.
Selecting Add New Price brings you to the Product Catalog Prices screen. For more information, see Creating a Price.
Step 3: Select Subscription Status to Meter For
Next, in Report for Subscriptions in dropdown, select what subscription status
you want to meter. For example, you may want to meter usage only for subscriptions
that have an Active status. The dropdown menu has the following options:
- Active
- Future
- In Trial
- Paused
- Non-Renewing
Step 4: Define the Filters and Metrics
Lastly, define your billing criteria.
After finishing these steps, select Create to finish creating the billing meter.
Analyze Usage and Revenue
With the preceding steps, you now have a Billing Meter that accurately tracks, meters, and reports your product usage. After you have the reporting-only Billing Meter enabled, you can analyze your usage-based revenue according to this Billing Meter through Billing Report Metrics.
You can also access the raw usage data a reporting-only Billing Meter meters through Moesif Management API and in CSV file format.
Access Usage Data Through API
In your reporting-only Billing Meter screen, select API/Export and then select Get Via API.
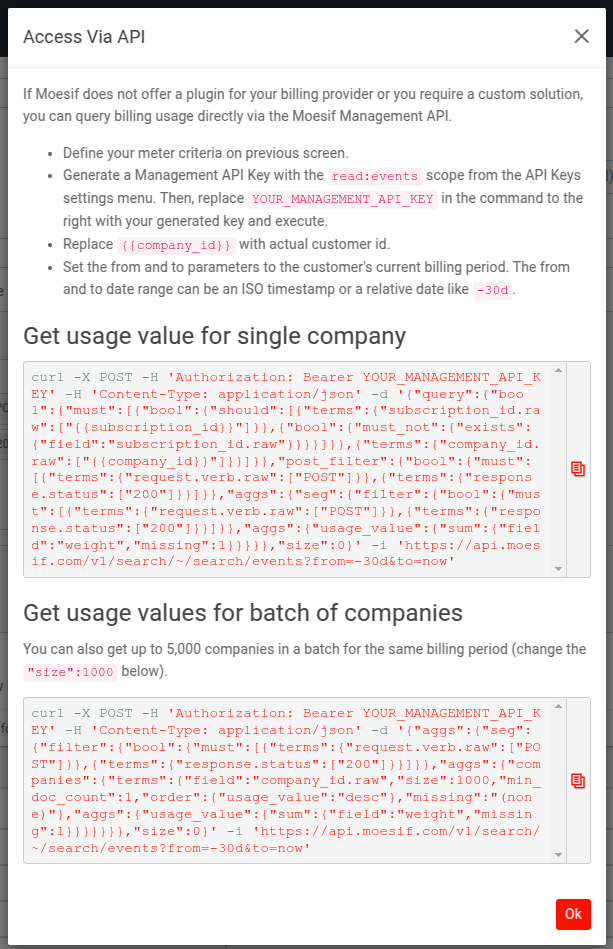
The dialog contains the necessary instructions you need to follow to fetch usage data, including the cURL commands.
To generate a Management API key for the commands, follow these steps:
- In Moesif Portal, select the account icon to bring up the settings menu.
- Select API Keys.
- From the Management API Key section, select
Readscope forevents. - Optionally, set the key’s expiration time.
- Select Generate Token.
Get Usage Data in CSV Format
In your Billing Meter screen, select API/Export and then select CSV Download. In the dialog that appears, select Proceed to confirm.