Setting Up Custom Billing Provider
This document describes how to set up a custom billing provider with Moesif Developer Portal.
Overview
Setting up a custom billing provider with Moesif Developer Portal involves the following steps in general:
- Creating a plan and price definining the subscription of your product.
- Implementing a checkout process.
- For a successful checkout, implement the backend logic that performs the following
tasks:
- Verifies the purchase and subscription details.
- Create subscription object.
- Send the data to moesif.
- Provision required services.
Set the Environment Variables
Set the following environment variables to custom:
my-dev-portal.env.REACT_APP_PAYMENT_PROVIDER=custom
my-dev-portal-api.env.APP_PAYMENT_PROVIDER=custom
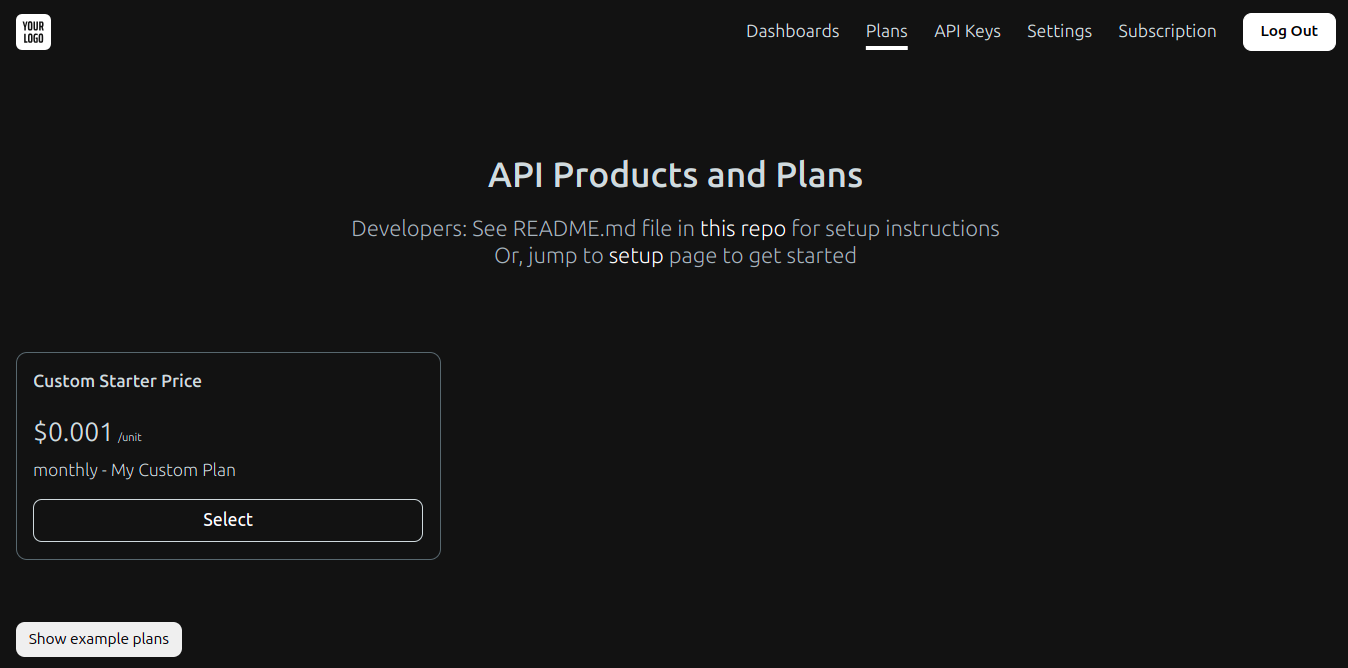
Define Your Product Subscription
Use Moesif’s Product Catalog feature to create the Plan and Price for your product subscription. Make sure you create a custom plan by selecting Custom. After successfully, creating the plans and prices, the developer portal shows the available plans in the Plans page.
Implement the Checkout Process Form
Now you need to implement the checkout process form for your custom plan as the
CustomCheckForm React component:
import React from "react";
import { Link } from "react-router-dom";

function CustomCheckoutForm({ planId, priceId, user, idToken }) {
  return (
    <div id="checkout">
      <div>
        <h3>
          For custom billing provider, please implement your custom check out
          flow here.
        </h3>
        <ul>
          <li>
            Typically, the flow involves redirecting to a payment gateway.
          </li>
          <li>
            Upon successful payment, it should come back to{" "}
            <code>
              http://127.0.0.1/return?price_id={encodeURIComponent(priceId)}
              &plan_id={encodeURIComponent(planId)}
            </code>
            , with some sort of success code or identifier
          </li>
          <li>
            On return page, it would make API call to backend:
            <ul>
              <li>to verify the payment is successful.</li>
              <li>to create the subscription.</li>
              <li>to provision any services.</li>
            </ul>
          </li>
          <li>
            For now: to simulate success return from payment provider, continue
            to:{" "}
            <strong>
              <Link
                to={`/return?price_id=${encodeURIComponent(
                  priceId
                )}&plan_id=${encodeURIComponent(planId)}`}
              >
                <button>return page</button>
              </Link>
            </strong>
          </li>
        </ul>
      </div>
    </div>
  );
}

export default CustomCheckoutForm;
Implement Successful Checkout
After you perform checkout through the checkout form you build in the preceding step, the following flow of events must happen:
- The backend verifies the purchase and subscription details
- The backend creates the subscription
- The backend provisions the necessary services, if any
Initiate Successful Checkout
The
registerPurchaseCustom function function sends the purchase and subscription details to the backend
for verification:
function registerPurchaseCustom({
  planId,
  priceId,
  sessionId,
  idToken,
  user,
  setCustomerEmail,
  setStatus,
  setLoading,
  setProvisionError,
}) {
  setLoading(true);

  fetch(`${import.meta.env.REACT_APP_DEV_PORTAL_API_SERVER}/register/custom`, {
    method: "POST",
    headers: {
      "Content-Type": "application/json",
      Authorization: `Bearer ${idToken}`,
    },
    body: JSON.stringify({
      plan_id: planId,
      price_id: priceId,
      // session_id:
      // you may have a some sort of session id or checkout id from your payment provider that you can
      // use to verify purchase on the backend.
    }),
  })
    .then(async (res) => {
      if (!res.ok) {
        const errorBody = await res.json();
        throw new Error(
          `Failed provision: ${res.status}, body: ${JSON.stringify(errorBody)}`
        );
      }
      return res.json();
    })
    .then((data) => {
      setStatus("complete");
      setCustomerEmail(user?.email);
    })
    .catch((err) => {
      setProvisionError(err);
    })
    .finally(() => {
      setLoading(false);
      moesifIdentifyUserFrontEndIfPossible(idToken, user);
    });
}
It sends the purchase and subscription details, like plan and price IDs,
to the /register/custom endpoint. The next step shows how you you can verify
those details.
Verify Successful Purchase
The verification involves these steps:
-
Implement the
BillingProviderclass containing the verification logic. It must work with your custom billing provider to verify that a purchase is successful and return the subscription details accordingly. For example, the following assumes a successful purchase, creates a hard-coded subscription object, and returns it:class BillingProvider { verifyPurchaseAndCreateSubscription(req, data) { // use the request info to verify the purchase after checkout // but generally your billing provider should verify the subscription // and return the subscription object. // below is a fake subscription generated on the fly. const subscription = { id: generateGUID(), plan_id: data?.plan_id, price_id: data?.price_id, ...data, current_period_start: new Date().toISOString(), current_period_end: getOneMonthFromNowISO(), }; return { subscription, }; // throw new Error('Verify Purchase Not Implemented.'); } } -
Write the handler function for HTTP
POSTrequest to/register/customendpoint that uses theBillingProviderimplementation to verify purchase and create subscription. For example:app.post( "/register/custom", authMiddleware, jsonParser, async function (req, res) { const customerId = await getUnifiedCustomerId(req.user); const email = req.user?.email; // verify plans and subscription using your custom billing provider. try { const { subscription } = await customBillingProvider.verifyPurchaseAndCreateSubscription(req, { user: req.user, ...req.body, }); console.log("custom subscription created", subscription); syncToMoesif({ companyId: customerId, userId: customerId, email: email, }); sendSubscriptionToMoesif({ companyId: customerId, subscriptionId: subscription.id, planId: subscription.plan_id, priceId: subscription.price_id, currentPeriodStart: subscription.current_period_start, currentPeriodEnd: subscription.current_period_end, metadata: { // additional metadata you might want add. }, }); const user = await provisioningService.provisionUser( customerId, email, subscription.id ); res.status(201).json({ status: "provisioned" }); } catch (err) { console.error("Error registering user", err); res.status(500).json({ message: "Failed to provision user. " + err.toString(), }); } } );Here, the callback function extracts the subscription object from your implementation of
BillingProviderfor a successful purchase. It then sends the subscription data to Moesif and provisions the user services.