Creating Saved Cohorts
Saved Cohorts are dynamic lists of users (or companies) that match a defined criteria. Saved Cohorts are a powerful component within Moesif that unlock the functionality behind features like Dynamic Sampling, Behavioral Emails, and Governance. Moesif automatically updates these lists in the background allowing notifications to be sent to a variety of notification channels via email, Slack, PagerDuty and more. These notifications include a list of all users (or companies) that have been added and removed from a cohort.
Saved Cohorts can be useful when trying to identify when individual users are having an issue or error. For instance, it may be useful to the Customer Success team to know when users are experiencing a specific error, such as an HTTP 401 Unauthorized response when trying to access an API. In this tutorial, we will create a fairly simple Saved Cohort that keeps track of all of the users that fit this condition.
Let’s find out how we can accomplish this in Moesif.
To follow this guide you will need:
- A Moesif account
- Successful integration with your API(s)
That’s it!
In this tutorial we will be creating a user cohort, however; all steps covered in this guide apply equally to users and companies. The only differences are the metadata properties that are available.
Accessing Saved Cohorts
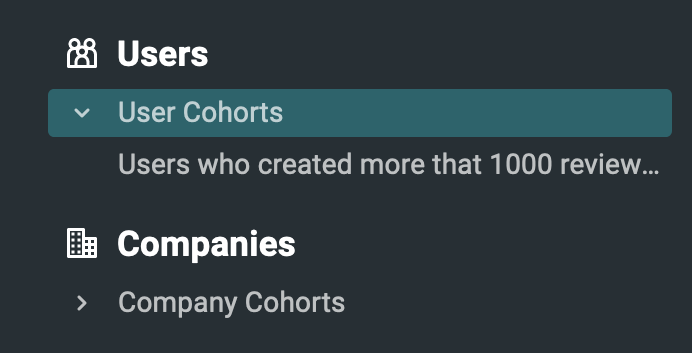
Saved Cohorts can be accessed at any time by selecting User Cohorts (or Company Cohorts) on the left side navigation pane.

These Saved Cohort screens give an overview of all previously created cohorts as well as an examination of their set criteria, enabled notification channels, as well as their Dynamic Sampling rates and priorities. We’ll take a look at those later on in this tutorial.
Additional actions are available by selecting the ellipsis button (…). These actions include deleting a cohort as well as instructions on how to obtain a list of users (or companies) that belong to a selected cohort via Moesif’s API.

All Saved Cohorts can be listed on the left side navigation view by enabling the drop down option of the User Cohorts (or Company Cohorts) button.
Creating New Saved Cohorts
To begin creating a new cohort, click the + Cohort button on the top right of the page.

You will then be presented with the cohort creation screen. This is where all criteria can be set as well as enabling the many features Saved Cohorts integrate with.

There are 3 main sections of the page to take note of:
- The name of your cohort
- Your Saved Cohort should have a descriptive name.
- The criteria of your cohort
- This determines the rules that apply to the Saved Cohort.
- The cohort info pane
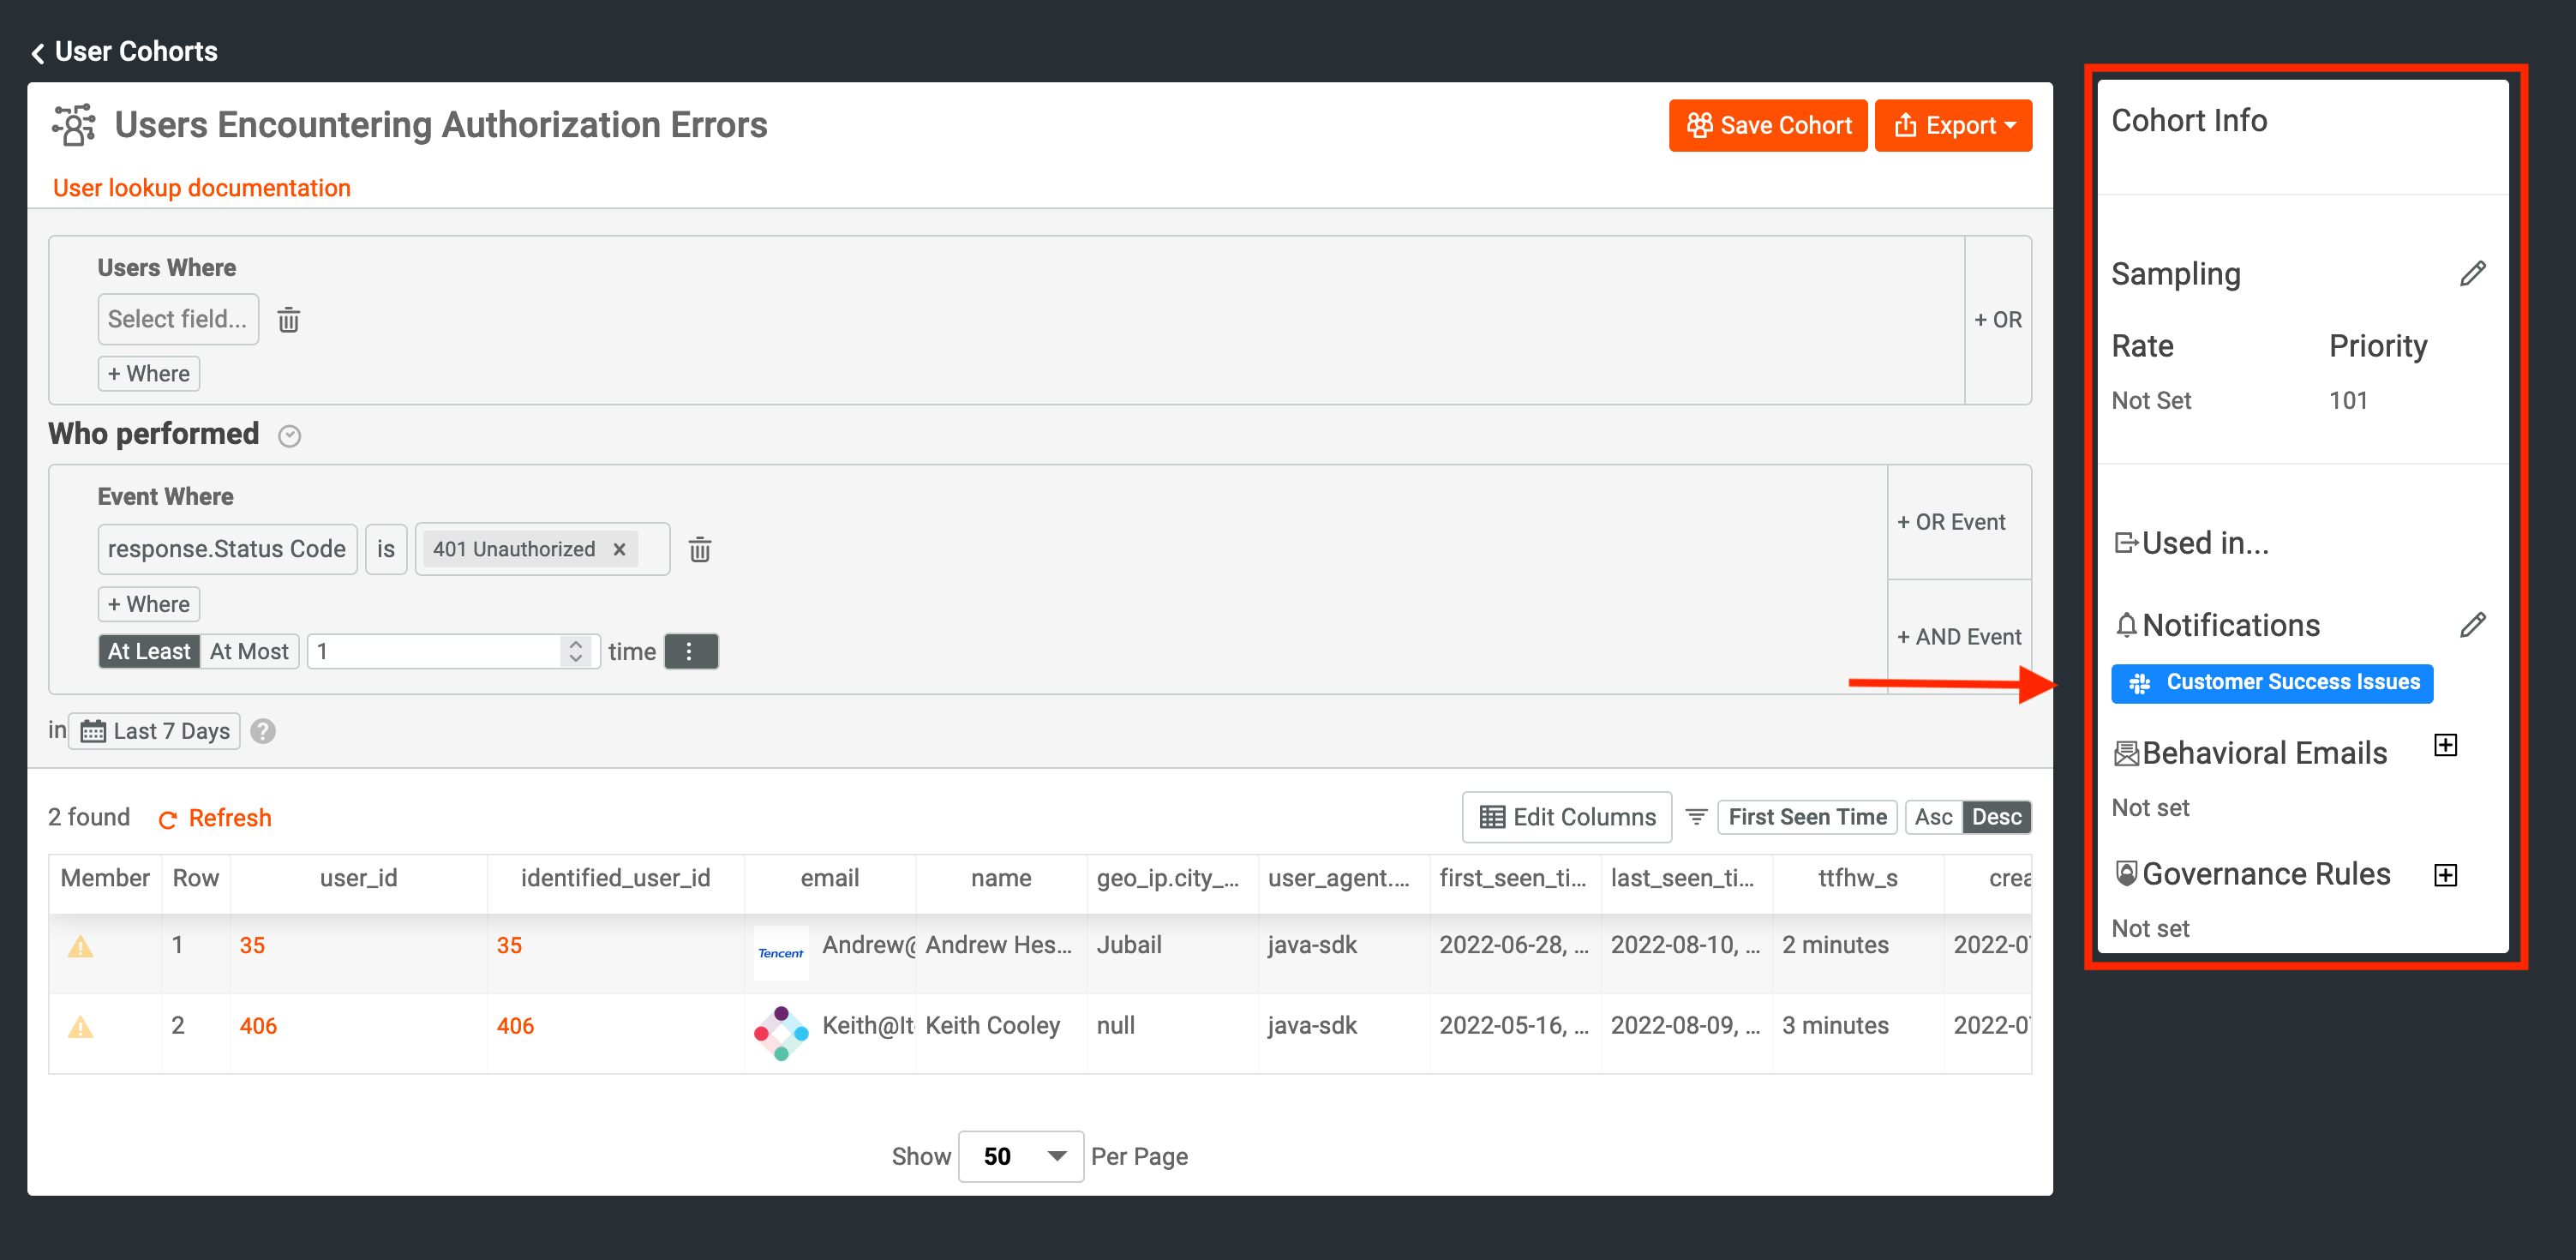
- This pane shows at-a-glance information about your cohort as well as the ability to set Dynamic Sampling rates, notification channels, and Governance rules.
We’ll start by providing our cohort with a descriptive name.

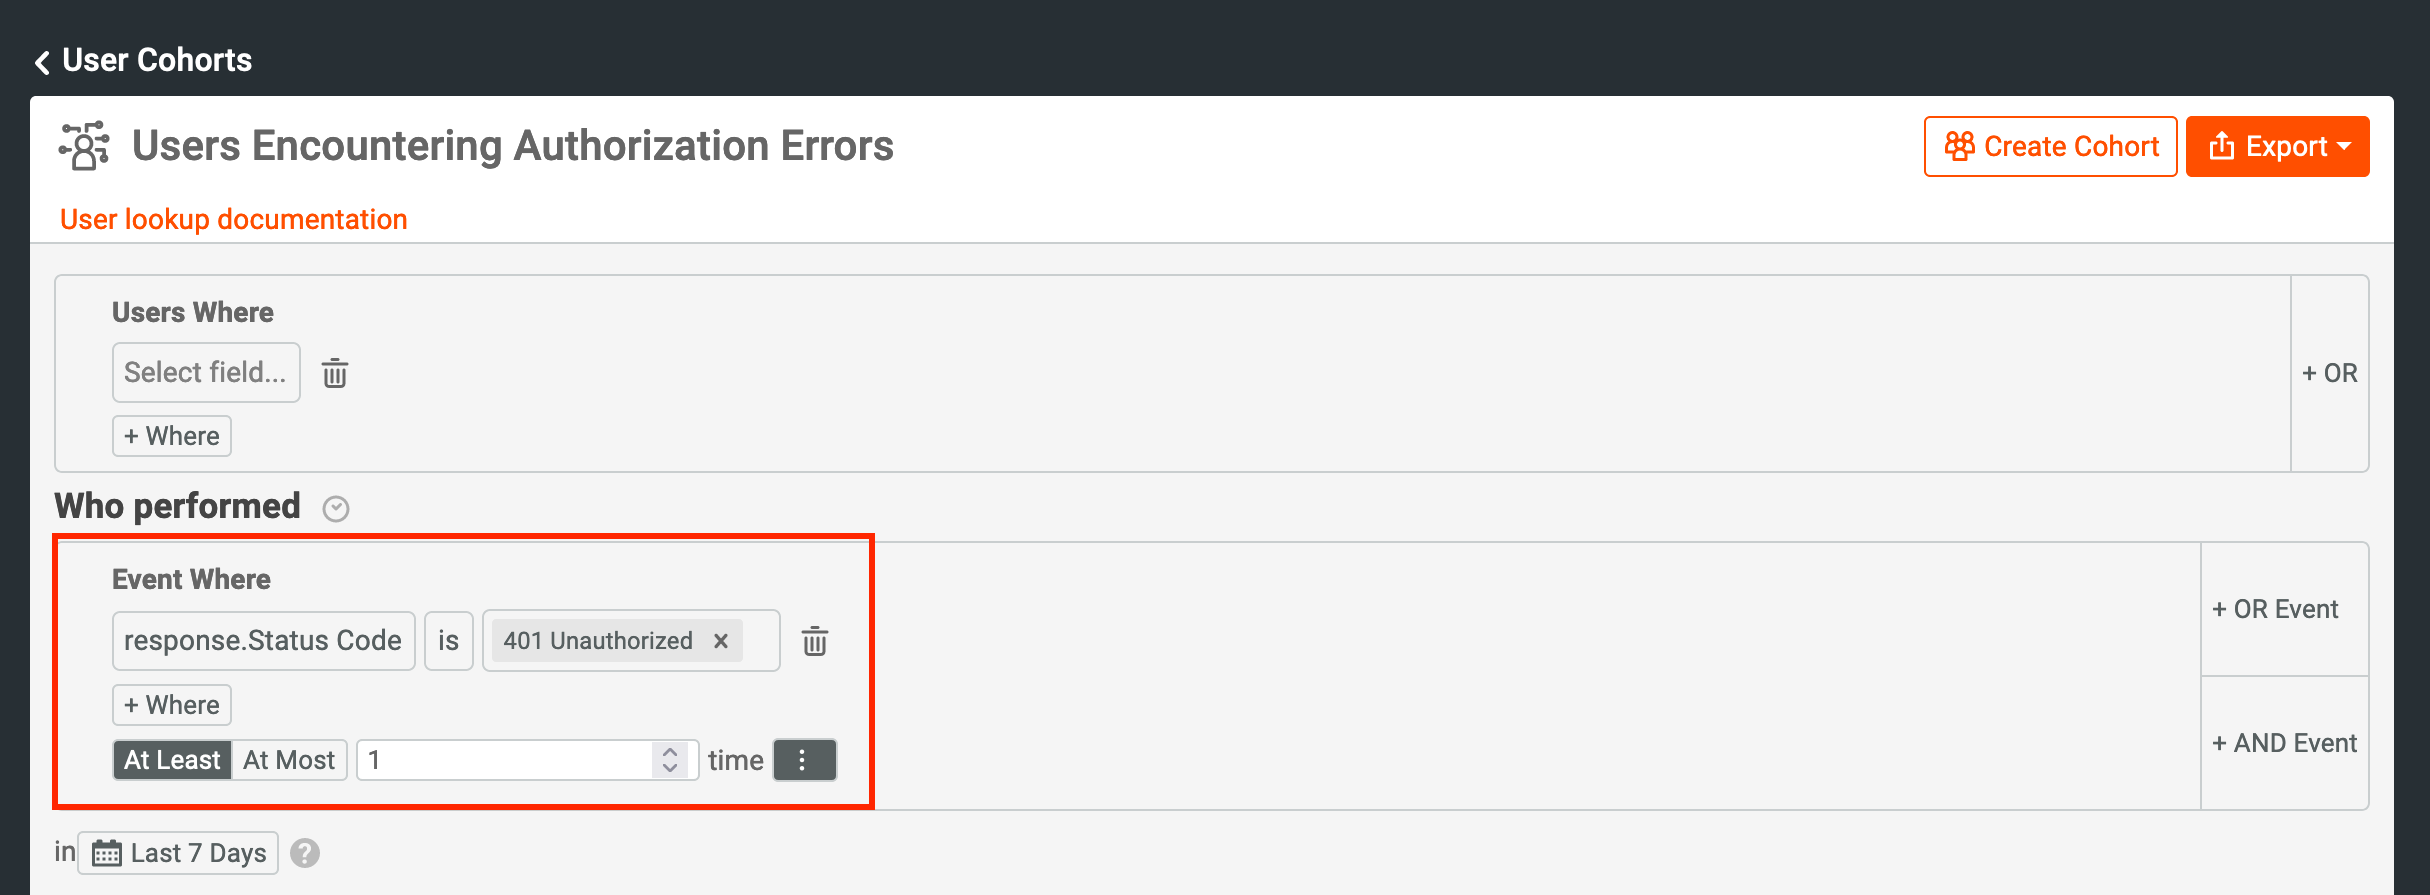
Next, we’ll define the cohort’s criteria. Under the Who Performed and Events Where heading we’ll select response.Status Code is 401 Unauthorized. More complex rules can be created by utilizing the + OR Event or the + AND Event filters along with the date range selector at the bottom of the criteria panel.

We can see the list of users instantly updated to include only those who have encountered 401 Unauthorized errors in the past 7 days.

There are two alternative ways to create new Saved Cohorts:
- By selecting the + New button on the left navigation pane. A modal will appear and under the Behavioral Cohorts section select either User Cohort or Company Cohort.
- From any User or Company Lookup screen after applying filter criteria and selecting Create Cohort on the top right.
Saving a Cohort
When you are satisfied with your filter criteria, select the Create Cohort button on the top right of the page.

A modal will appear allowing you to verify the specified criteria. You can always come back later to enhance or edit a Saved Cohort. Select Create Cohort on the bottom right of the modal.

Another modal will appear asking if you would like to apply additional features to your newly created cohort or return to the your list of created user (or company) cohorts. Feel free to do so - but for now we will select Close.

We’ll then be taken back to our Saved Cohort configuration screen.
Enabling Cohort Notifications
A cohort notification is a type of user notification that can send a list of all users (or companies) matching your Saved Cohort to a notification channel of your choosing.
I have already created a Slack notification channel called Customer Success Issues to be utilized in this example. Check out our documentation on notification channels to create one for yourself then refer back to this guide to follow along.
To set up a notification channel, select the pencil icon () next to the Notifications heading on the Cohort Info pane.

A modal will appear and we’ll select the Customer Success Issues channel that will notify our Customer Success team right in Slack. Select Save on the bottom right of the modal.

We will then see our newly created cohort notification reflected immediately in our Cohort Info pane.

Wrapping Up
You are now ready to jump in and explore all the functionality behind Saved Cohorts and begin building out your own rules! Utilizing notifications and other features such as Dynamic Sampling, Behavioral Emails, and Governance truly shows off the power of Saved Cohorts.

For a grander overview of features, be sure to check out our blog post on Saved Cohorts. Also, be sure to dive into our documentation to discover some more advanced features like numeric aggregations and grouping.
We can’t wait for you to start building out your own Saved Cohorts in Moesif!
