Moesif plugin for Google Tag Manager
-
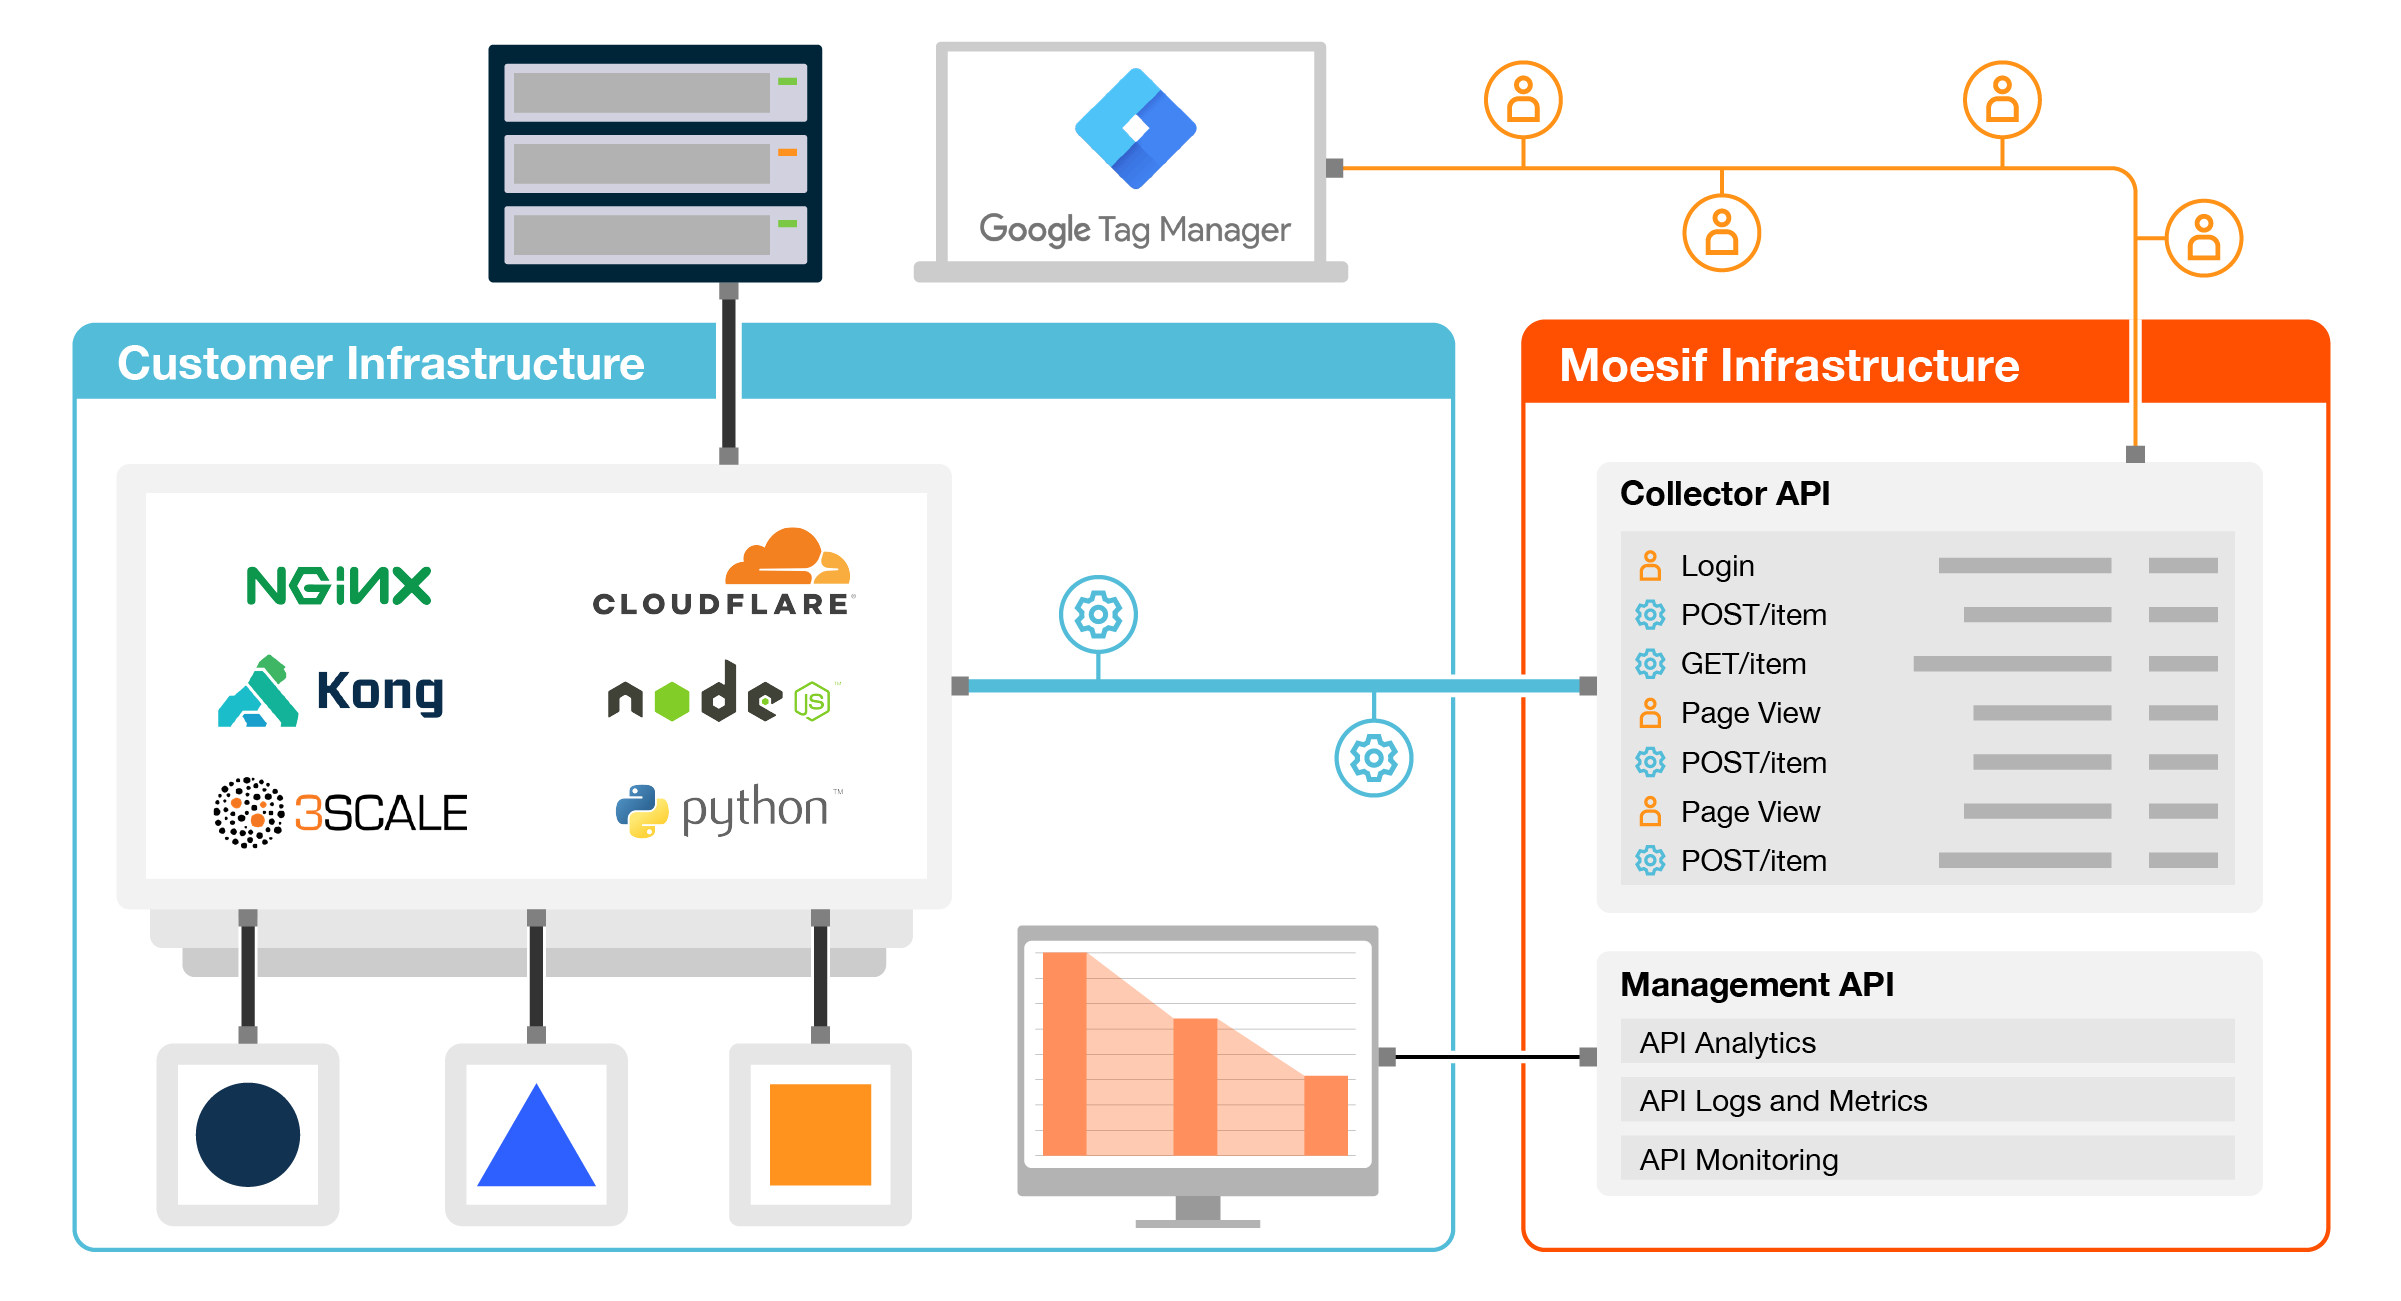
Moesif is an API analytics service. This tag enables you to track user behavior within your web app. You can also install the Moesif server agent to understand the customer journey across both your website and APIs together.
-
Google Tag Manager account is a free application which enables marketing and product teams to quickly add script tags for analytics, attribution tracking, and more without code changes.
You can use this plugin alongside a Moesif server integration to monitor server-side API traffic. This enables you to track your end-to-end customer journey and build cross-platform funnel reports like your initial sign up to first API call conversion rate.
How to install
Moesif has a GTM tag in the Google Tag Manager template gallery. This installs the moesif-browser-js script without any code changes.
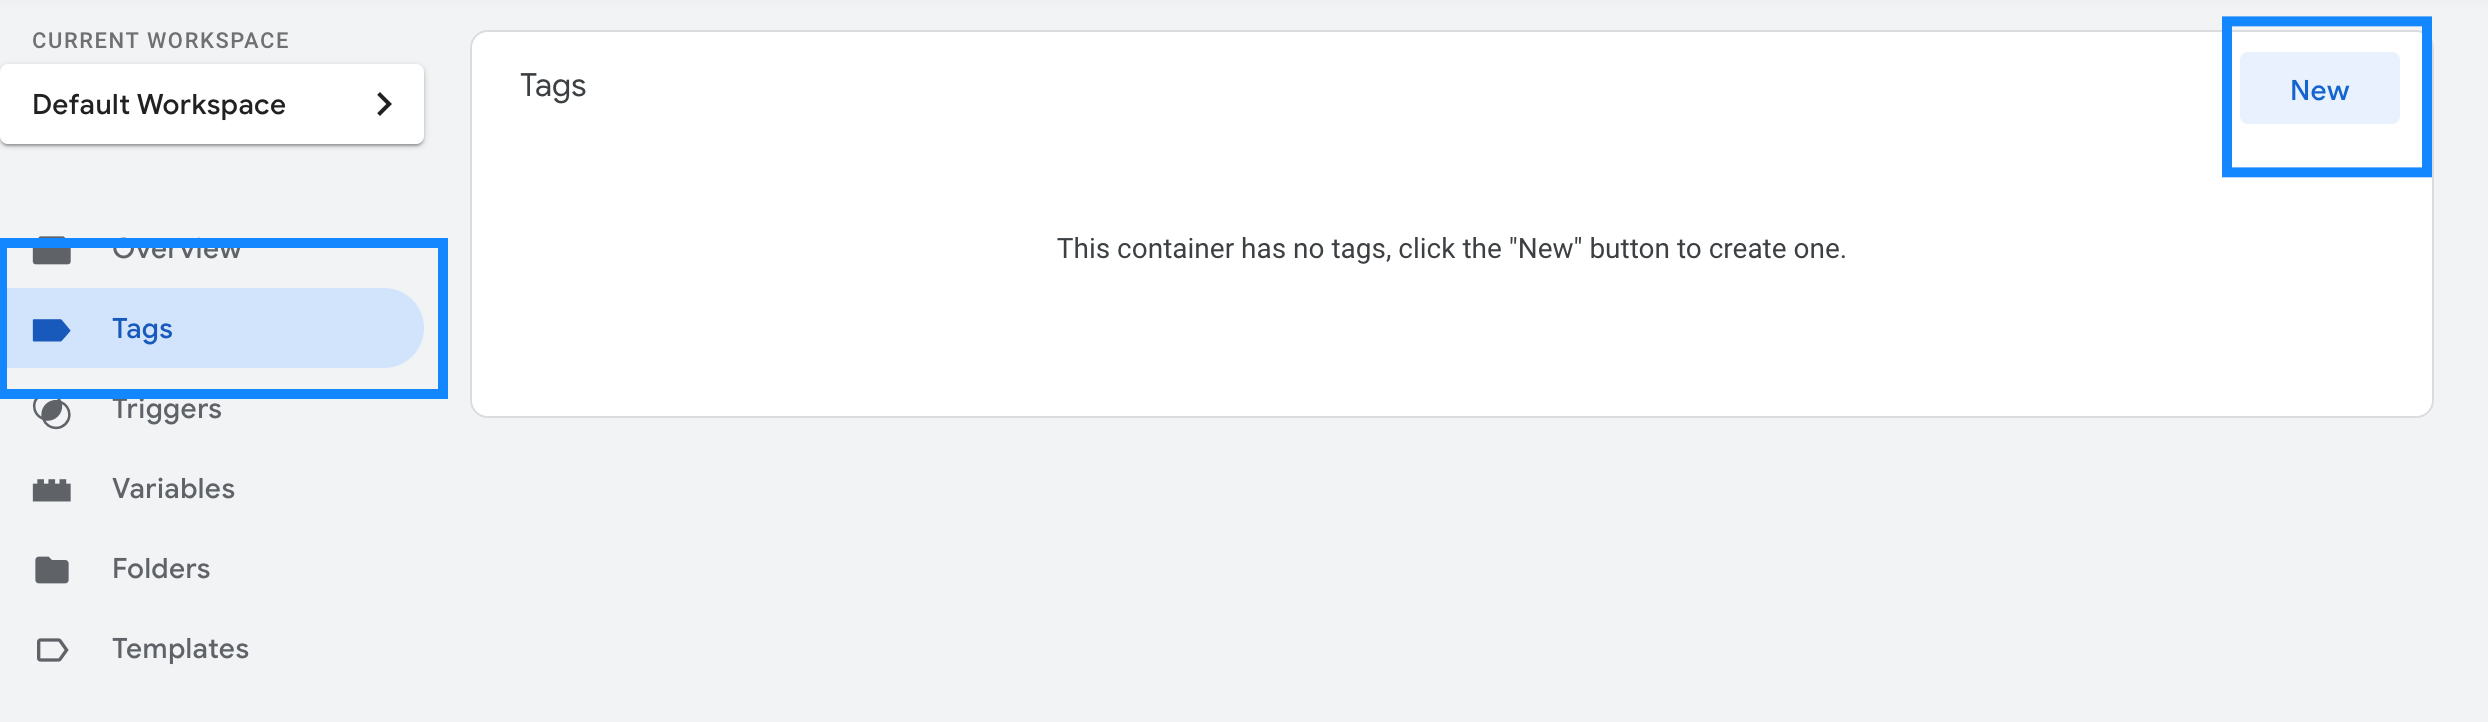
1. Add Tag
Log into your Google Tag Manager account and select Tags from the left menu. Then, click New from the top right like in the below picture.
Select the Community Template Gallery blue banner and search for “Moesif API Analytics”. Then, click the blue Add to Workspace button.
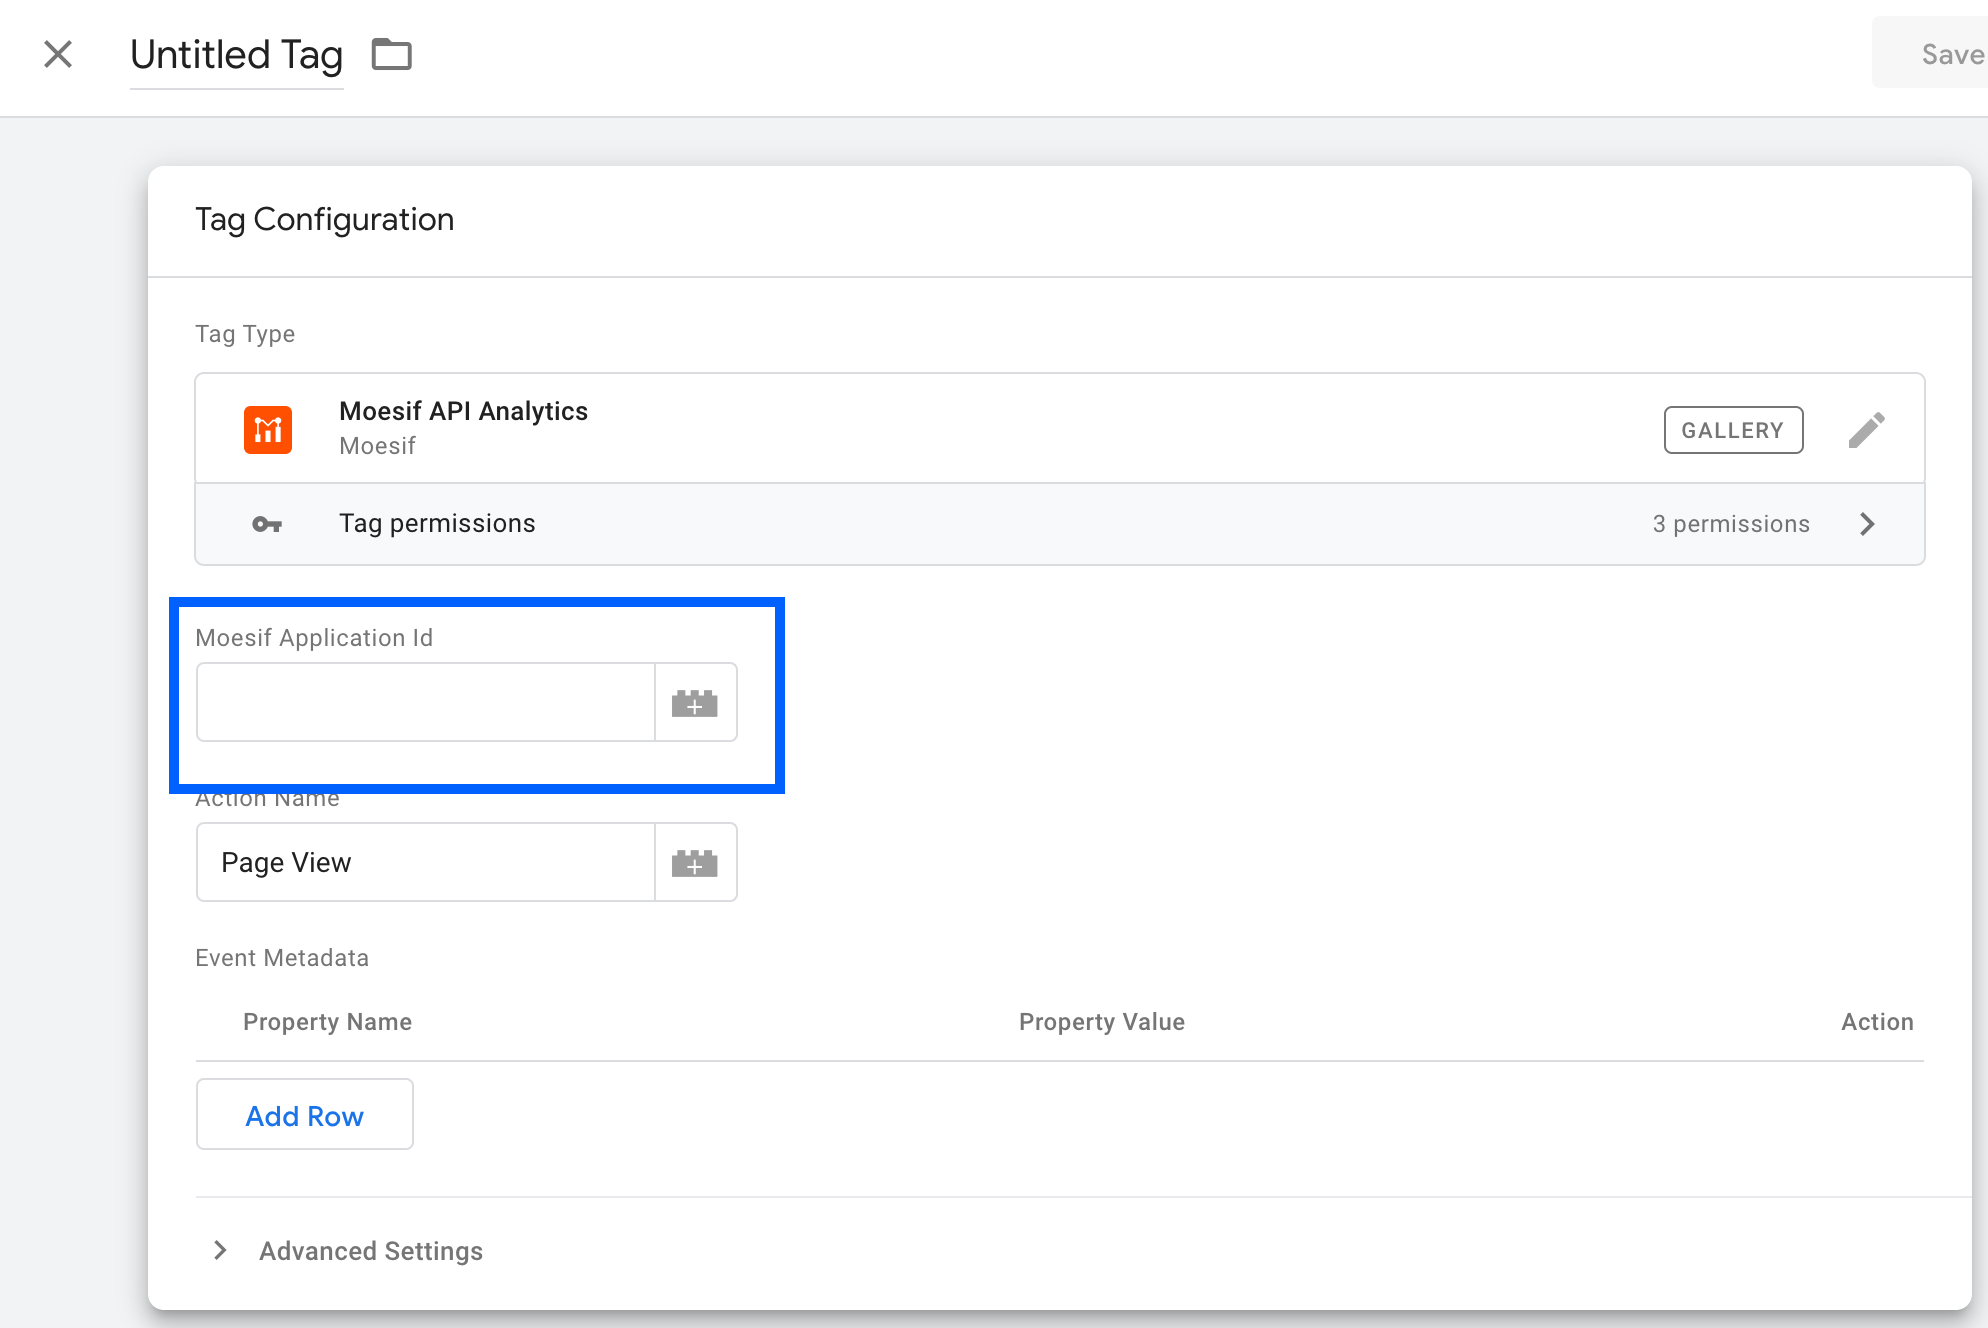
2. Set Moesif Application Id
In the Tag configuration, add your Moesif application Id. Your Moesif Application Id will be displayed during the onboarding steps when signing up for Moesif.
By default, the Action Name is set to “Page View”. We recommend setting a descriptive name based on your chosen trigger in next step. For example, if the tag is fired on your Sign In Page, then set Action Name to “Sign In”
3. Choose a Trigger
Choose a trigger that will cause the tag should be fired such as “All Pages”.
For more info on how to create custom triggers, see Google’s documentation.
How to use
When the tag is fired, the tag will log a user action to Moesif.
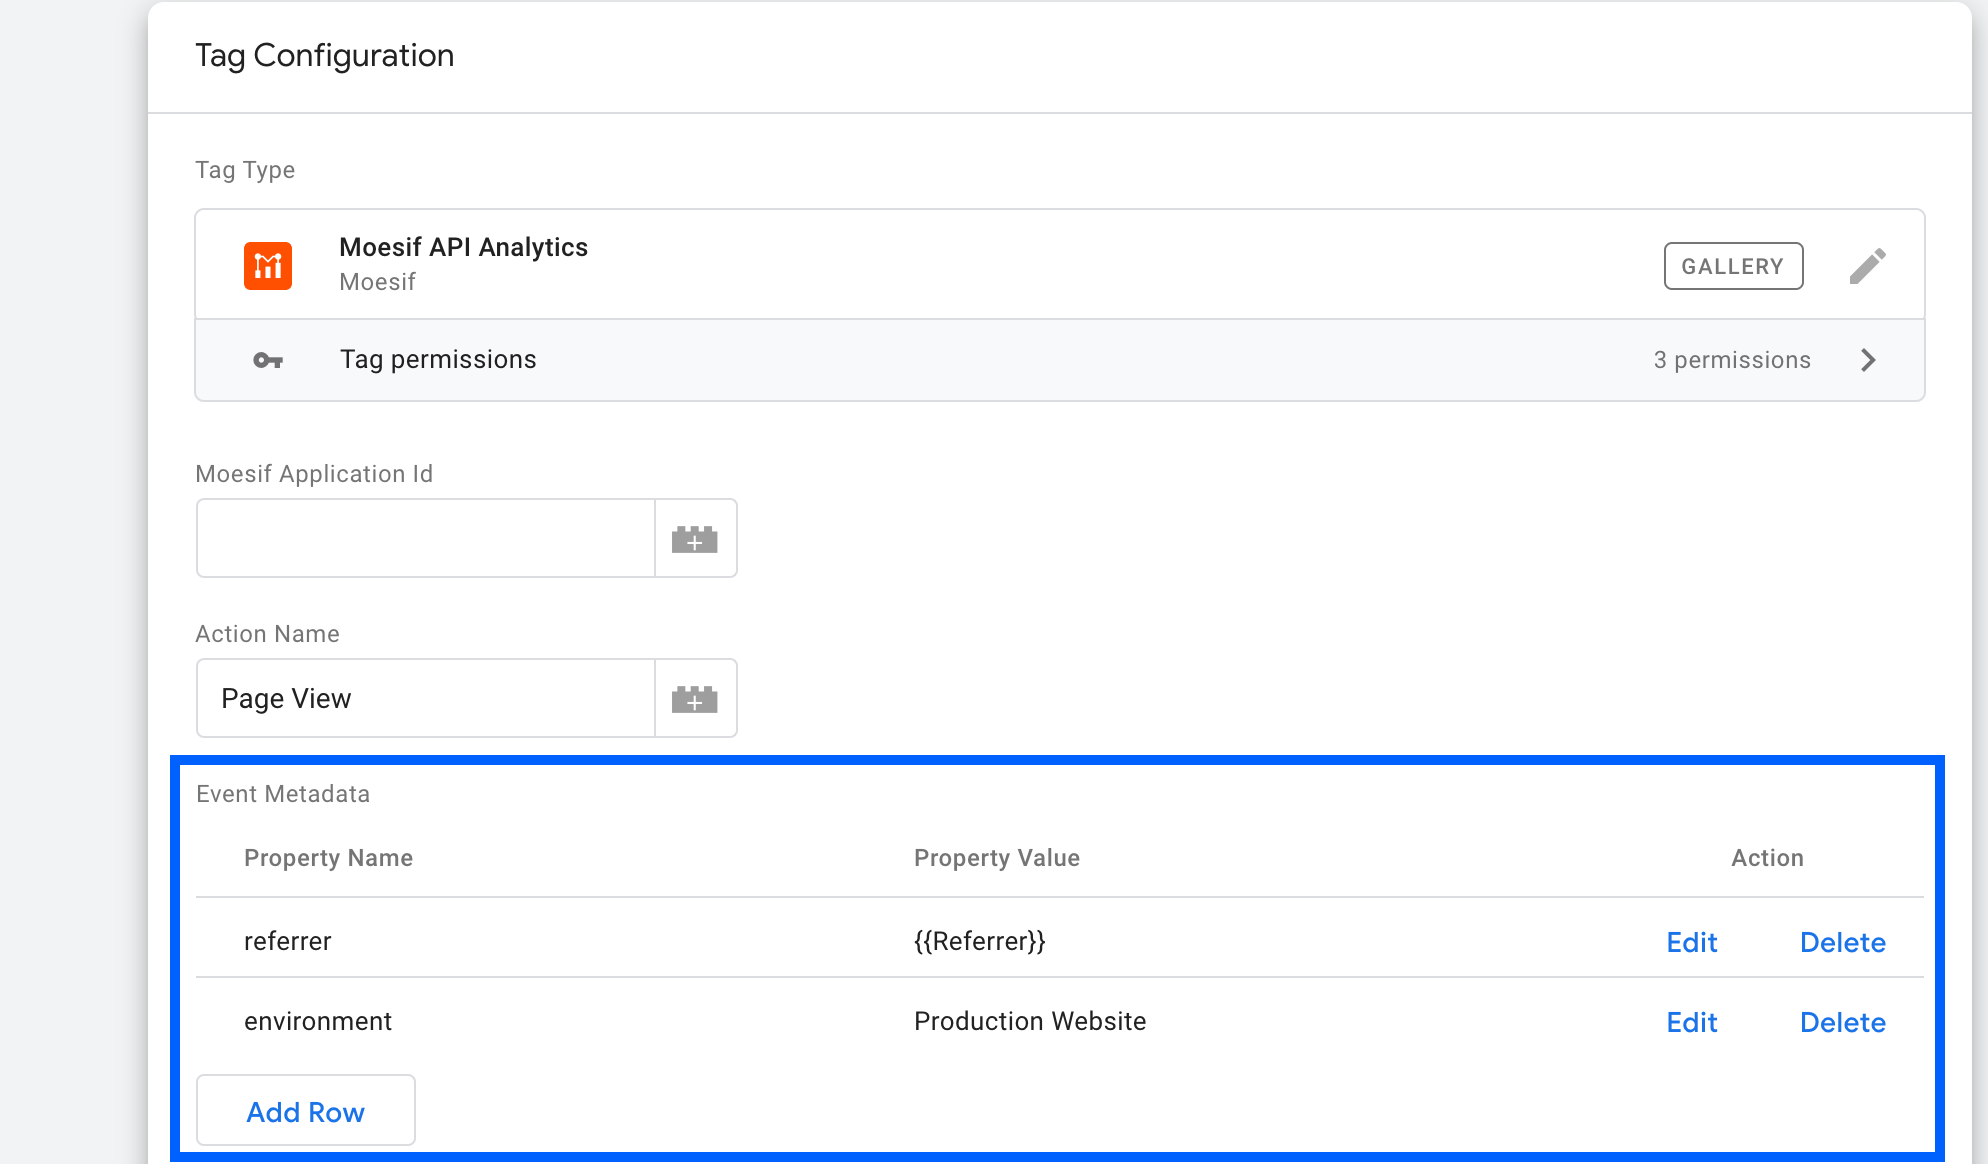
Event metadata
The Tag also supports event metadata which is a table of key/value pairs. The tag also supports dynamic variables.
You can access any of the moesif-browser-js APIs via window.moesif including identifyUser(). This can be useful since Google Tag Manager doesn’t support tracking user ids directly.
Identifying users
When you know the user’s id such as after sign in, call identifyUser.
This tells Moesif who the current user is so their actions can be linked to a user profile.
Besides the userId, you can also save related properties such as user demographics and subscription information.
window.moesif.identifyUser("12345", {
  email: "john@acmeinc.com",
  firstName: "John",
  lastName: "Doe",
  title: "Software Engineer",
  salesInfo: {
    stage: "Customer",
    lifetimeValue: 24000,
    accountOwner: "mary@contoso.com",
  },
});
The recommended place to call identifyUser is after the user logs in and you know their real user id.
Do not call
identifyUserfor anonymous users. Moesif will track these users automatically.
Identifying companies
In addition to identifying users, you can also identify the company for account-level tracking. Besides the companyId, you can also save related properties such as company demographics and website domain.
// Only the first argument is a string containing the company id. This is the only required field.
// The second argument is a object used to store a company info like plan, MRR, and company demographics.
// The third argument is a string containing company website or email domain. If set, Moesif will enrich your profiles with publicly available info.
metadata = {
  orgName: "Acme, Inc",
  planName: "Free Plan",
  dealStage: "Lead",
  mrr: 24000,
  demographics: {
    alexaRanking: 500000,
    employeeCount: 47,
  },
};

window.moesif.identifyCompany("67890", metadata, "acmeinc.com");
If you call both identifyUser() and identifyCompany() in the same session, then Moesif will automatically associate the user with the company.
Tracking actions directly
Since you have the entire moesif-browser-js API
available through window.moesif, you can track actions directly using
the track() function:
window.moesif.track('clicked_sign_up', {
  button_label: 'Get Started'
});