Monetizing a Gen-AI-Based ChatBot API by Metering Token Usage
Motivation:
For many Gen AI-based applications, usage-based billing is crucial. It is especially important if you are using third-party models that charge you for tokens used. You want to ensure that your cost of tokens used is covered by your customers, in addition to charging for your own value add.
In this tutorial, we will build a quick Chat Bot API using OpenAI’s ChatGPT, and then use Moesif and Stripe to meter the number of tokens used and report the usage to Stripe to be charged.
Building Simple Chat API
Create a file called requirements.txt and add the following:
Flask==3.0.0
openai==0.27.0
python-dotenv==1.0.1
moesifwsgi
Then install the dependencies.
pip install -r requirements.txt
Create a file called .env, where we’ll put your API keys. You can create an account with OpenAI, and you may need to put in at least $1 in your OpenAI account. For the Moesif Application ID, you can obtain it from a free account.
OPENAI_API_KEY="Obtain from your Open AI Account"
MOESIF_APPLICATION_ID="Obtain from your Moesif Account"
Create a new file called app.py, the code for the Chat API is very simple:
from flask import Flask, request, jsonify
import openai
from dotenv import load_dotenv
import os
from moesifwsgi import MoesifMiddleware

# Load environment variables from .env file
load_dotenv()

# Set your OpenAI API key here
openai.api_key = os.getenv('OPENAI_API_KEY')

app = Flask(__name__)

@app.route('/chat', methods=['POST'])
def chat():
    user_input = request.json.get('message')

    # Define the onboarding conversation
    conversation = [
        {"role": "system", "content": "You are a customer onboarding agent."},
        {"role": "user", "content": user_input}
    ]

    response = openai.ChatCompletion.create(
        model="gpt-3.5-turbo",
        messages=conversation,
        max_tokens=150
    )

    # Extract the response text and token usage

    response_text = response.choices[0].message['content'].strip()
    tokens_used = response.usage.total_tokens

    response_obj =  jsonify({
        'response': response_text,
    })

    # Add the token usage to the response headers
    response_obj.headers['X-Tokens-Used'] = tokens_used
    # Adding the value to header is just one of many approaches.
    # Since Moesif can do metering on almost any field, you can add the
    # value to Header, Body, or even Metadata.

    return response_obj
The API is a simple facade for ChatGPT, but we added a response header X-Tokens-Used. There are other
approaches to capture this data which is briefly discussed in the last section.
Add Moesif Middleware
## Moesif Middleware Setup:
def identify_user(app, environ, response_headers=dict()):
    # Your custom code that returns a user id string
    user_id = "my-chat-user"
    return user_id

def identify_company(app, environ, response_headers=dict()):
    # Your custom code that returns a company id string
    # hardcoded to this value for now.
    company_id = "my-chat-company"
    return company_id

moesif_settings = {
    'APPLICATION_ID': os.getenv('MOESIF_APPLICATION_ID'),
    'DEBUG': False,
    'LOG_BODY': True,
    'IDENTIFY_USER': identify_user,
    'IDENTIFY_COMPANY': identify_company,
    'CAPTURE_OUTGOING_REQUESTS': False
}

# flask
app.wsgi_app = MoesifMiddleware(app.wsgi_app, moesif_settings)

if __name__ == "__main__":
    app.run(debug=True)
In this example, we didn’t implement authentication, but when you implement authentication, you can easily replace the placeholder user_id and/or company_id with the actual ids. (Btw, see Moesif Entity Diagram to see relationships model for users, companies, and subscriptions.
That is basically all the code you need. Let’s run it.
python app.py
Please send a few API requests using the curl command below.
curl --request POST \
  --url http://localhost:5000/chat \
  --header 'Content-Type: application/json' \
  --data '{
	"message": "How are you? What do you do?"
}'
You should be able to see your API calls captured in Moesif Event Stream.
Now, we just need to configure your Moesif and Stripe accounts.
Connect Moesif to Stripe
Follow detailed instructions on Moesif Docs to connect Moesif to your Stripe account..
For the purpose of this demo, when configure the id mapping, map the Moesif Field company_id to Stripe Field customer.company_id
This mapping helps Moesif identify the Stripe customer that the company_id associated with the API event.
Create Plans/Price with Moesif’s Product Catalogue
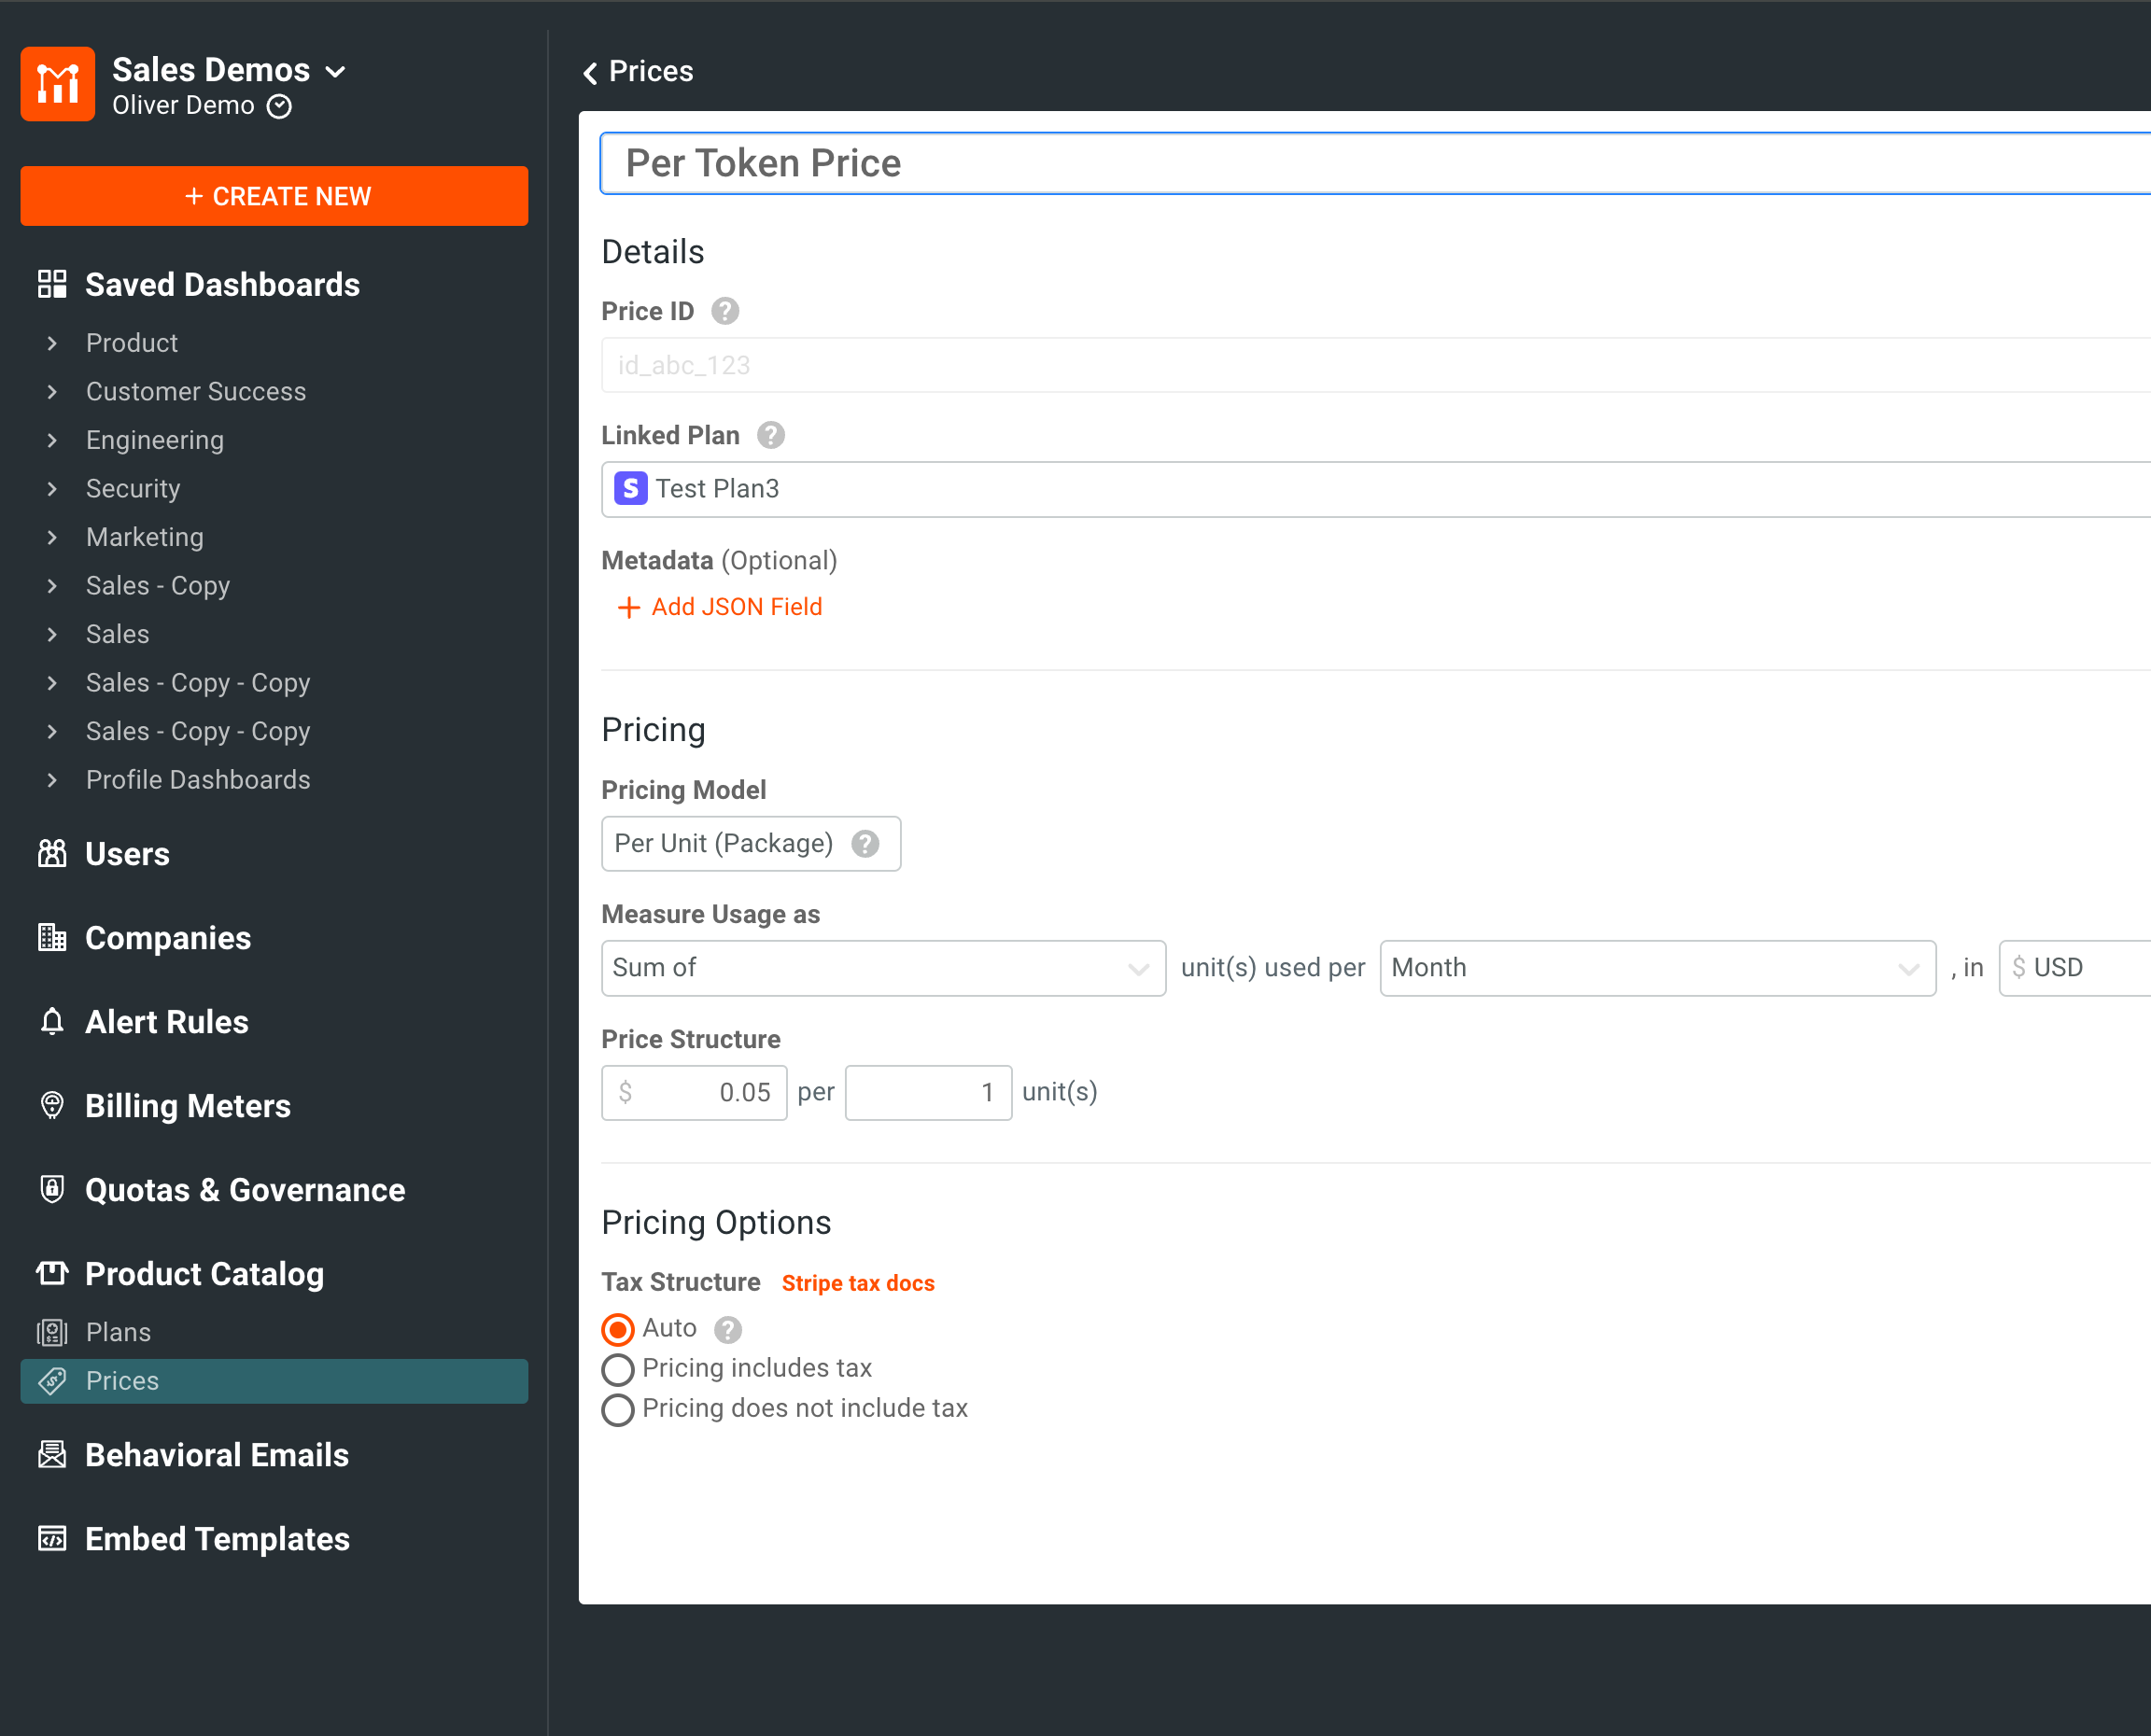
For usage-based billing, you need a plan which has one or more prices. Each price represents one resource you are charging usage on.
Even though you can create plans and prices in Stripe directly, Moesif’s Product Catalogue feature makes it easier and creates synchronized plans in Stripe for you.
Go ahead Create a Test Plan and Price for Per Unit of tokens, see image example below.

Create a Billing Meter.
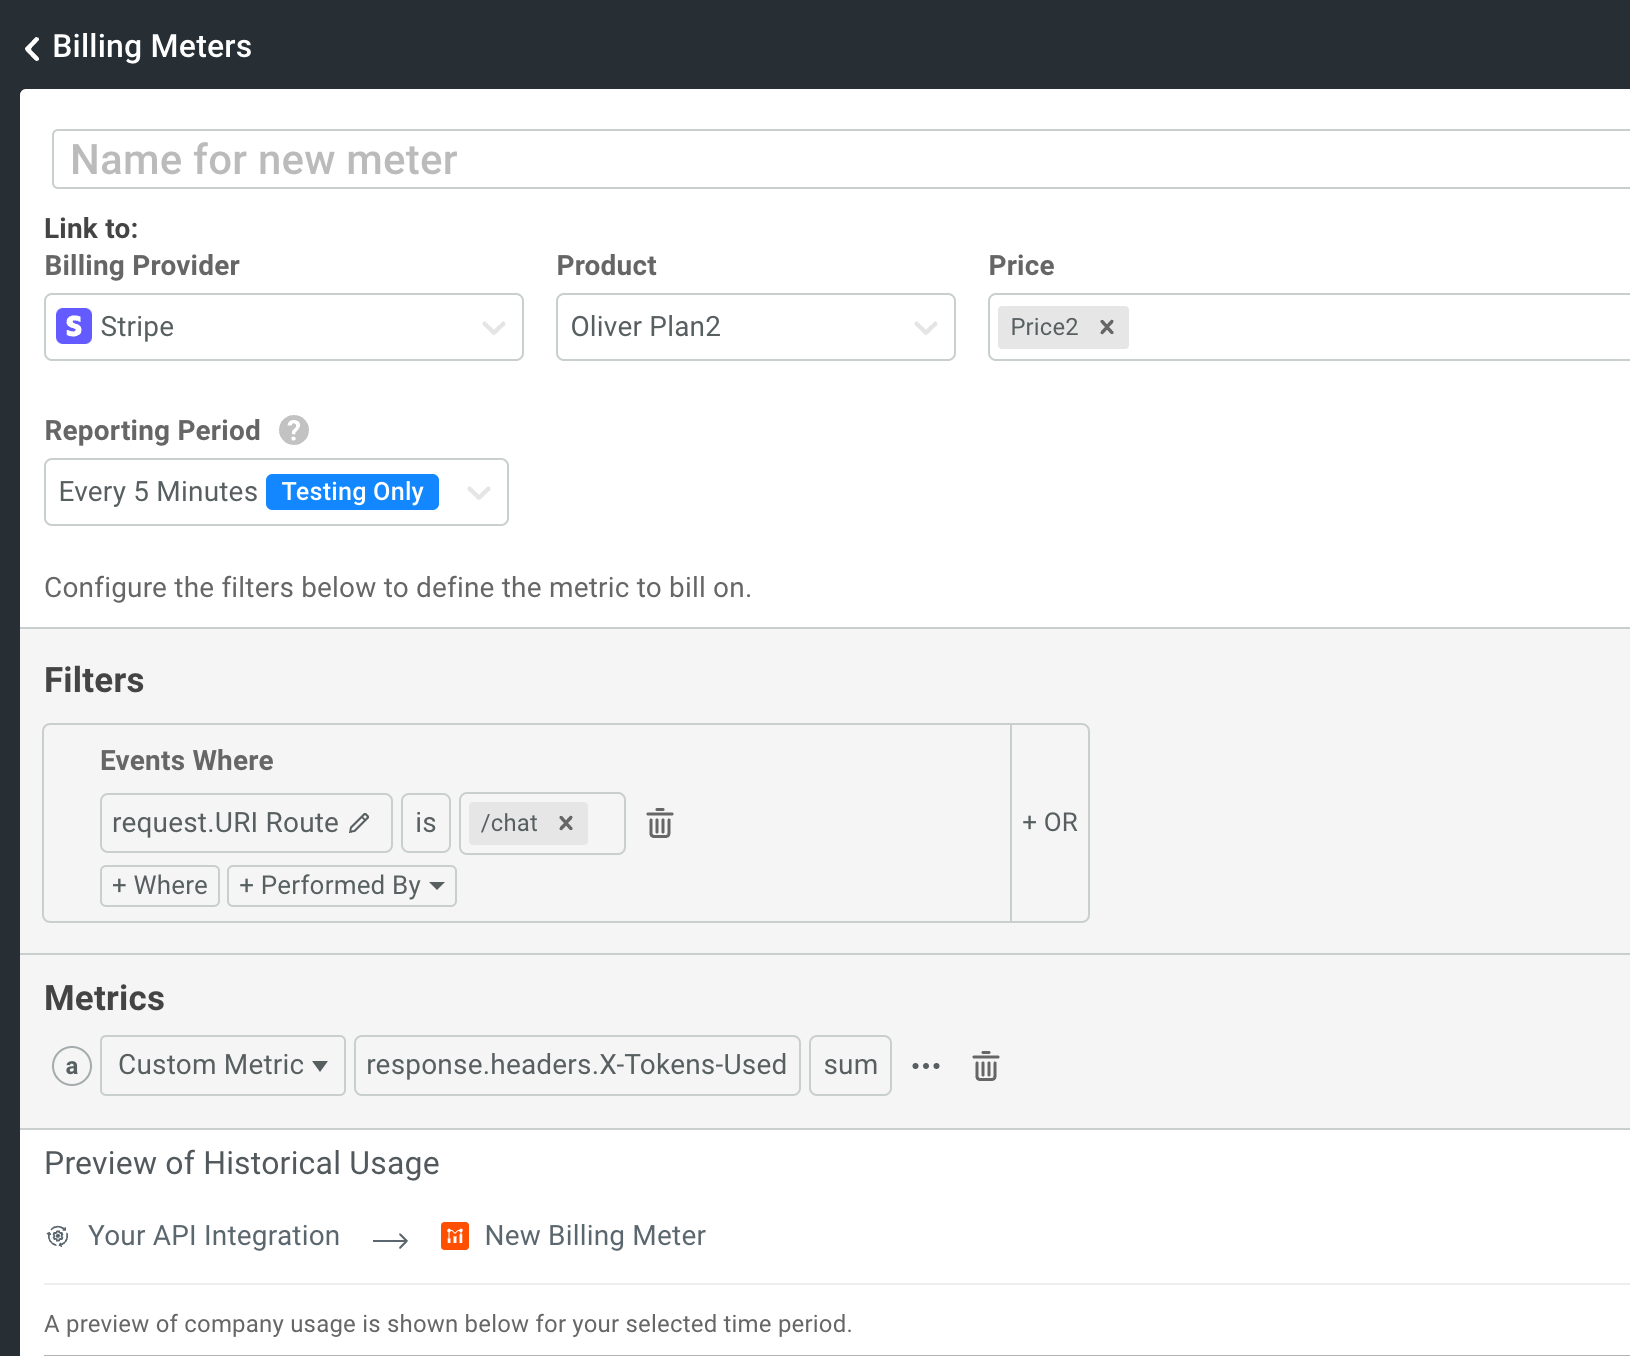
The Billing Meter ties a Metric to the Plan/Price and then reports that metric value to Stripe or other billing providers. Here, we’ll create a billing meter for the SUM of the response.Headers.X-Token-Used header we set earlier.
In Moesif, click on Billing Meter and click create new, and in the billing meter form:
- Select the Billing Provider Stripe, and the Plan and Price we just created earlier.
- (Optional) Set Filters so that
request.URI Routeis/chat. (You can add additional criteria such as status is 200.). -
For metric configuration, select Custom Metric. Then use Field Select to select
response.headers.X-Tokens-Used, and usesumas the function to add them together.
For more details, see documentation for Billing Meter.
Test and Verify
Above is basically all the set up you need. Let’s test and verify.
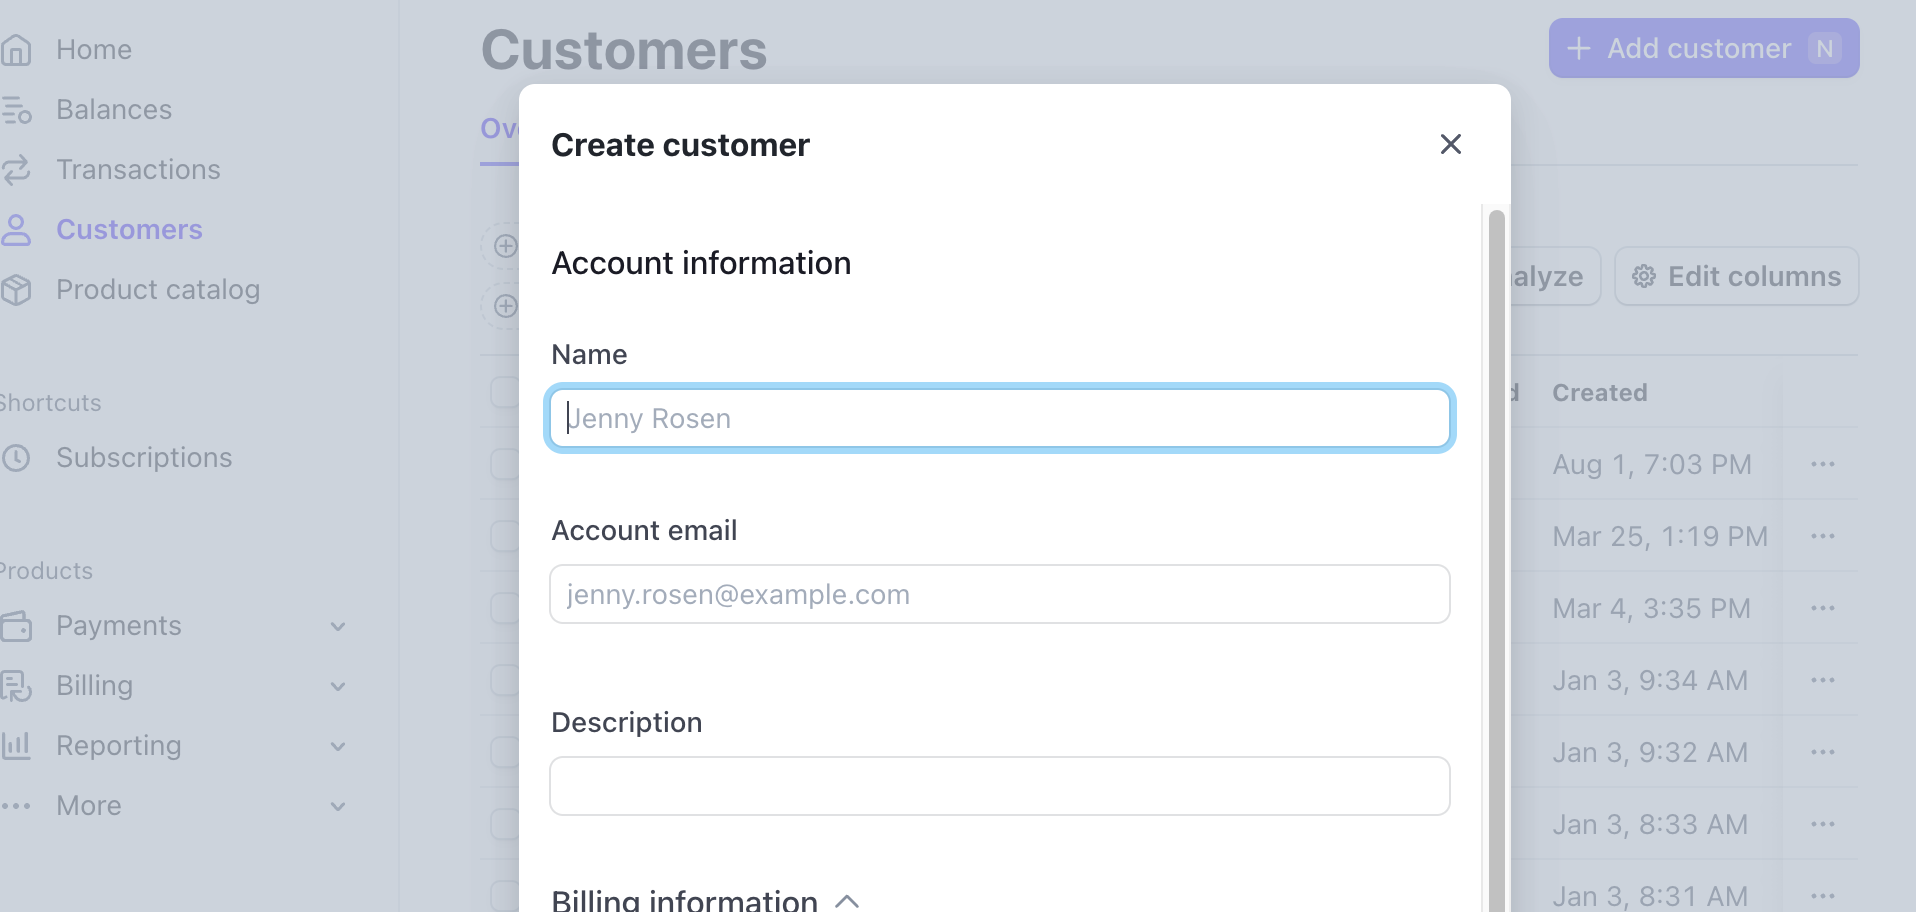
Create a Customer and Subscription in Stripe.
Typically, a customer and a subscription are created automatically in Stripe’s checkout flow. But for this purpose, create both objects manually in Stripe’s dashboard.
-
1: Create a customer.

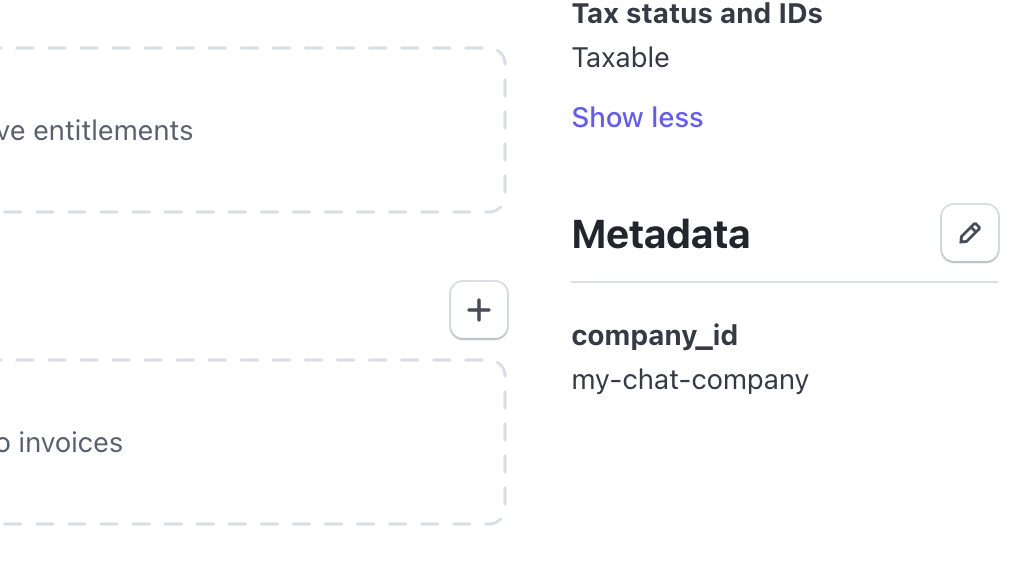
-
2: Add metadata on the customer, and set
company_idto the valuemy-chat-company, which is the “identify_company” hook currently hard coded to in MoesifMiddleware example above. This is how the stripe’s customer id is tied to a company_id.
-
3: Add a subscription to the customer, using the plan we created earlier in Moesif which should be synced to Stripe.
Send more API Request again.
Now, the API calls send to your test server should be metered and reported to Stripe for payment collection.
Conclusion & Where to Go from Here:
Gen-AI products can get expensive, so metering usage of various resources will be very important. Above is an example showing how you can set up Usage Billing quickly and tie the cost to the value that you created for your customer.
The code in this example is on Github.
Next step, please explore the Moesif Docs to see how flexible and powerful the Billing Metering solution can be.
- Scenario: You are not using Flask or Python.
- Explore the Moesif Middleware for various SDKs and Platforms, and the options you can use to set Metadata, identify_user, and identify_company).
- Scenario: You are using a different Billing Provider than Stripe:
- See the supported billing providers.
- Or use a Custom Webhook to receive usage reports.
- Scenario: Your usage data isn’t tied to an API, but some backend processing tasks.
- Moesif supports two type of Events: APIs and Custom Actions. In your backend processing tasks, you can send Custom Actions to Moesif.
- Scenario: Our usage metric isn’t tied to an incoming API, but to an outgoing API, e.g. the out going API to OpenAI.
- Solution: Many of our SDKs support “captureOutgoing” option. You can capture those API calls and send to Moesif, and then create metrics on them.
- Scenario: You need to meter on a different metric:
- Please see doc on choosing a billable metric.
- For more advanced scenarios, see the powerful Scripted Field feature where you can compute new values using any other fields.
- Implement
GET_METADATAhook in most Moesif SDKs to pre compute any value and add to the event.


